Installing Ubuntu 10.04 LTS
May 10, 2010 at 11:05 13 comments
Ubuntu 10.04, also known as the Lucid Lynx, arrived on April 29th, 2010 and is the twelfth release of the Ubuntu OS. We’ve created the following tutorial to teach Linux newcomers how to install the Ubuntu 10.04 LTS operating system on their personal
computer. Therefore, it is addressed to people who have just heard about Ubuntu, those who have never installed Ubuntu before and want to test it, but don’t know how.
The tutorial will make things very simple for you, but if you get stuck somewhere in the middle of the installation and you need help, do not hesitate to use our commenting system at the end of the article!
Requirements:
You will need the Ubuntu 10.04 LTS Desktop ISO image that corresponds to your hardware architecture (i386 or amd64), and that can be downloaded from here. When the download is over, burn the ISO image with your favorite CD/DVD burning application (Nero, CDBurnerXP, Roxio) on a blank CD at 8x speed.
Reinsert or leave the CD in your CD/DVD-ROM device and reboot the computer in order to boot from the CD. Hit the F8, F11 or F12 key (depending on your BIOS) to select the CD/DVD-ROM as the boot device.
Wait for the CD to load…

You will see the wallpaper and the installation wizard. Select your language and click the “Install Ubuntu 10.04 LTS” button to continue…

Where are you?
The second screen will feature a map of the Earth. Upon the selection of your current location, the time for the final system will adjust accordingly. You can also select your current location from the drop-down list situated at the bottom of the window. Click the “Forward” button after you have selected your desired location…

Test your keyboard
On the third screen, you will be able to choose a desired keyboard layout. But the default automatic selection should work for most of you. Click the “Forward” button when you have finished with the keyboard configuration…

Hard disk partitioning
You have four options here:
1. If you have another operating system (e.g. Windows XP) and you want a dual boot system, select the first option: “Install them side by side, choosing between them at each startup.”
Editor’s Note: This option will ONLY appear if you have another operating system installed, such as Microsoft Windows. Remember that, after the installation, the Windows boot loader will be overwritten by the Ubuntu boot loader!
2. If you want to delete your existing operating system, or the hard drive is already empty and you want to let the installer automatically partition the hard drive for you, select the second option, “Use the entire disk.”

Editor’s Note: This option is recommended for most users who do not have another operating system installed or who want to erase an existing one, for example Windows OS.
3. The third choice is “Use the largest continuous free space” and it will install Ubuntu 9.10 in the unpartitioned space on the selected hard drive.
4. The fourth choice is “Specify partitions manually” and it is recommended ONLY for advanced users, to create special partitions or format the hard drive with other filesystems than the default one. But it can also be used to create a /home partition, which is very useful in case you reinstall the whole system.
Here’s how you do a manual partitioning with /home:
– Select the “Specify partitions manually (advanced) and click the “Forward” button;
– Make sure that the selected hard drive is the right one. /dev/sda is the first physical hard drive. /dev/sdb is the second hard drive in your machine. So, make sure that you know which is the one you want to format! Otherwise, you will lose ALL YOUR DATA on that hard drive;
– Let’s say that the selected drive is empty (no other operating system or important data on it), but it has some partitions on it. Select each one of those partitions and click the “Delete” button. After a few seconds, it will say “free space.” Do this with the other partitions from the selected hard drive, until they’re all deleted and you have a single “free space” line;
– With the “free space” line selected, click on the “Add” button. In the new window, type 2000 in the “New partition size in megabytes” field and select the “swap area” option from the “Use as:” drop down list. Click the OK button and, in a few seconds, you’ll notice a “swap” line with the specified size;
– With the “free space” line selected, click on the “Add” button. In the new window, select the “Primary” option, type a value between 10,000 and 50,000 in the “New partition size in megabytes” field and select / as the “Mount point.” Click the OK button and, in a few seconds, you’ll notice an “ext4 /” line with the specified size;
– With the “free space” line selected, click on the “Add” button. In the new window, select the “Primary” option, type a value between 30,000 and 50,000 (or whatever space you have left on the drive) in the “New partition size in megabytes” field and select /home as the “Mount point.” Click the OK button and, in a few seconds, you’ll notice an “ext4 /home” line with the specified size.

This is how your partition table should look like. If so, click the “Forward” button to continue with the installation…
WARNING: Be aware that all the data on the selected hard drive or partition will be ERASED and IRRECOVERABLE.
Click the “Forward” button to continue with the installation…
Who are you?
On this screen, you must do exactly what the title says. Fill in the fields with your real name, the name you want to use to log in on your Ubuntu OS (also known as the “username,” which will be required to log in to the system), the password and the name of the computer (automatically generated, but can be overwritten).
Also at this step, there’s an option called “Log in automatically.” If you check the box on this option, you will automatically be logged in to the Ubuntu desktop. Click the “Forward” button to continue…

Are you really ready for Ubuntu?
This is the final step of the installation. Here, you can select to install the boot loader on another partition or hard drive than the default one, but it is only recommended for advanced users. If someone is installing to a USB memory stick, as if it was a USB hard drive, then they should know that the installer will mess with their computer’s hard disk drive MBR.
Therefore, click the “Advanced” button and select the correct drive (the USB stick in this case)…
Click the “Install” button to start the installation process…
 |
The Ubuntu 10.04 LTS (Lucid Lynx) operating system will be installed…

After approximately 10 to 18 minutes (depending on your computer’s specs), a pop-up window will appear, notifying you that the installation is complete, and you’ll need to restart the computer in order to use the newly installed Ubuntu operating system. Click the “Restart Now” button…

The CD will be ejected; remove it and press the “Enter” key to reboot. The computer will be restarted and, in a few seconds, you will see the Ubuntu boot splash…

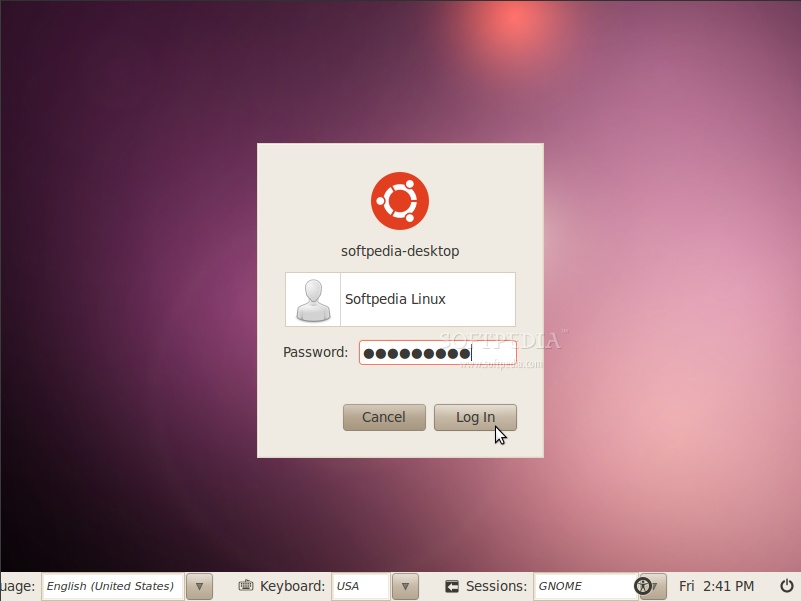
At the login screen, click on your username and input your password. Click the “Log In” button or hit Enter…
 |
Have fun using Ubuntu 10.04 LTS!
totally re-post from softpedia’s tips
Entry filed under: Linux, opensource, tutorial gak bermutu, Ubuntu Tips and Story. Tags: bagaimana cara install ubuntu, how to install ubuntu 10.04, how to install ubuntu lucid lynx, step by step to install ubuntu lucid lynx 10.04, Ubuntu 10.04, ubuntu kyu, Ubuntu Tips and Story.
13 Comments Add your own
Leave a comment
Trackback this post | Subscribe to the comments via RSS Feed


1. spartan | May 10, 2010 at 12:54
hadir dengan gaya mac os ‘ungu’, lucid lynx memang oke
2. hellgalicious | May 10, 2010 at 13:01
blom pernah make ubuntu nih
but, thanks sharing infonya
3. Next Jimbun Punya | May 10, 2010 at 14:54
Mantab tutorial instalasinya. Sangat lengkap dan sangat cocok untuk pemula. Sip….
4. ciwir | May 10, 2010 at 16:42
akhire dah install….
jajal si ungu LTS (rock)
5. sanjati | May 10, 2010 at 19:50
saya juga dah install dan si lucid emang lebih terang.
6. Love4Live | May 10, 2010 at 21:10
kalau upgrade dari 9.10 gak lewat proses seperti diatas… 😀
7. r10 | May 11, 2010 at 18:37
masih penasaran install ubuntu via usb
8. endar | May 30, 2010 at 12:50
ubuntu 10.04 loadingnya sangat cepat….
9. Lebih Baik Terlambat Daripada Tidak Sama Sekali#1: Shipit akhirnya berbelas kasih kepadaku « da Gadgetboi's Blog | June 14, 2010 at 11:32
[…] sebulanan nich yah semenjak dirilisnya Lucid Lynx … Namun belum juga datang itu paket dari Shipit . Sebenarnya sih bisa saja saya […]
10. How To Install dan Tutorial setting WVDIAL di PCLinuxOS GNOME 2010 « da Gadgetboi's Blog | June 24, 2010 at 09:44
[…] Tutorilanya bisa anda lihat di blognya mas tuxlin dan sebenarnya tidak jauh beda dengan cara install ubuntu. Namun ada trik yang harus diingat bahwa turunan Mandriva ini masih sedikit buggy di setting […]
11. Sugeng | August 30, 2010 at 22:56
Aku selalu memakai yang trial buka karena gak mau install permanet tapi selalu saja setelah install di PC begitu di restart kembali ke tampilan XP 😡 😦 ada solusi gak ya ❓ 😕
Salam hangat serta jabat erat selalu dari Tabanan
12. gadgetboi | August 31, 2010 at 11:12
@sugeng: maksudnya gimana yah mas? setelah install enggak ada menu pilihan untuk masuk ke ubuntu gitu?
13. Cara Instal dual boot IGOS Nusantara 2011 dengan Windows « da Gadgetboi's Blog | September 13, 2011 at 09:05
[…] memberikan sedikit pengalaman saya cara menginstal Linux IGOS Nusantara 2011 secara grafik. Walau menginstal secara grafik lebih mudah. Namun IGOS Nusantara 2011 berbeda dengan Ubuntu yang menggunakan software installer […]